Custom Views
A custom view may perform any action (i.e. Create a node instance). But it should populate the "aHTML" stream object. As soon as the custom view has completed its execution, the contents of the "aHTML" object is embedded into
the HTTP Response object as an HTML string within the "<BODY></BODY>" tag pair. Ultimately this response object is returned to the requesting browser which will interpret and display the HTML contained in the
object.
This section covers the following topics
How does EAWM invoke a Custom View?
When the EAWM server receives a custom view request, if will typically look like this:
http://localhost/archi/ABTWSAC.EXE/Archie2CustomView-C632D983_1_FDEA956D5170694CBD280885A4488E84?33719<5239><5239>
http://localhost/archi/ABTWSAC.EXE/
|
Logical URL where the EAWM server is installed (found in the "ClassURL" setting)
|
Archie2CustomView
|
The name of the EAWM server class to receive and service the HTTP request
|
C632D983_1_FDEA956D5170694CBD280885A4488E84
|
The unique session ID of the user making the request.
|
<5239><5239>
|
The CGI variable list sent with the request. The first two CGI variables are reserved by the system, the first one represents the "Focus Node ID" and the second one represents the
"Custom View Node ID".
|
As soon as EAWM receives this request, it is sent to the "Archie2CustomView" class. This class invokes the "genCustomView: cgiVars:" method in the "Archie2BusinessTransactionClass".
The the "genCustomView: cgiVars:" method tries to find an instance of the "Archi Custom View" nodetype whose id is
equal to the second CGI variable and stores it into the "aCustomViewNode" variable, then it loads the node instance whose id is equal to the first CGI variable and stores it into the "aFocusNode" instance.
Finally, it loads your custom view source code from the "Description" attribute value belonging to the "aCustomViewNode" instance and generates the following source code, which is then complied and executed:
[|aCrLf aCustomViewNode aFocusNode aString aNewString aResult aHTML aBreakRel aBreakNode aSessionData
aCGIVars aFocusNodeType aUploadAccess counter1 counter2 counter3 temp1 temp2 temp3 temp4 temp5 temp6 temp7
temp8 temp9 temp10 temp11|
aCGIVars := OrderedCollection new.
aCrLf := '
'.
aCGIVars add: 19639.
aCGIVars add: 28187.
aSessionData := AbtWsiSessionDataManager sessionDictionary at:
'C632D983_1_FDEA956D5170694CBD280885A4488E84' ifAbsent: [nil].
aFocusNode := A2NodeHome singleton findById: '19639''.
aCustomViewNode := A2NodeHome singleton findById: '28187'.
aHTML := WriteStream on: ''.
<<Source code from the "Description" attribute value belonging to the "aCustomViewNode" instance is inserted here>>
^aHTML collection.] whenExceptionDo: []'
Once this code has executed successfully, the contents of the "aHTML" object is returned to the "Archie2CustomView"
class. This class embeds the contents into the "<BODY></BODY>" tag-pair and the HTML response object is returned to the HTTP server.
The Hello World Example
We are now ready to write some code for our new custom view. Navigate to the "Hello World" custom view instance, click on "edit" and type the following line in the "Description" textbox, then hit "Submit".
aHTML nextPutAll: 'Hallo World<BR>'.
Now, when you go back to the "Menu" browser and click on the "Hello World" link, the following browser window should appear.
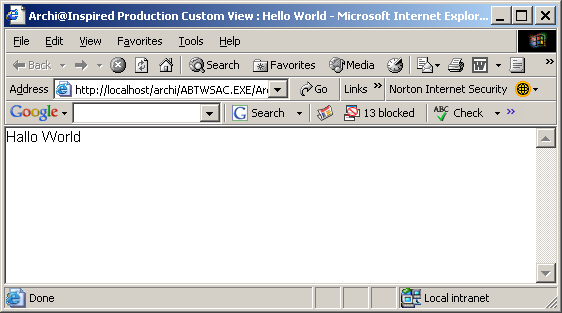
Displaying EVA Netmodeler information in a custom view.
In this section, we will use the custom view to display information contained in the EVA Netmodeler repository.
As an example, let's say we have a nodetype called "Application System", and we want to display a list of all the "Application System" instances contained in the repository.
First of all, we need to locate our "Application System" nodetype and store it into a local variable, this is done using the following line of code:
Next, we want to iterate through the instances of this nodetype and write them into the "aHTML" object. This is done using the following code:
temp1 activeInstancesOfType
do: [:each |
aHTML nextPutAll: (each description).
].
At this stage, refer back to the object model and home collection summary in section 2 and note how these sources can
be used to determine which method in the "A2NodeTypeHome" class should be used to find a nodetype instance with
the description "Application System". Try and locate the "activeInstancesOfType" method of the "A2NodeType" class.
Note from the model that his method will yield a collection of "A2Node" instances. Also note that the model can be used to determine that the "A2Node" object has a "description" attribute.
Now execute the "Hello World" custom view again by navigating to the "Menu" browser and clicking on the "Hallo World" link. The new browser window will now look like this:
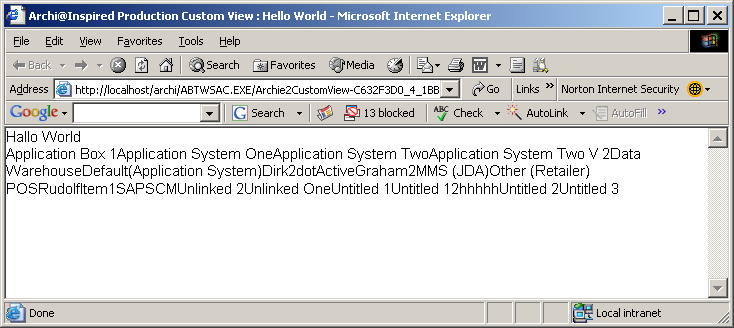
Adding your own Look and Feel to the custom view
The new custom view is doing what we want, but in a rather unattractive manner. Let's clean up the display by using
some HTML commands. First of all, we will create an HTML table, with a row for every instance of "Application System". So let's change our custom view code to the following:
aHTML nextPutAll: 'List of Applications<BR>'.
temp1 := A2NodeTypeHome singleton findByDescr: 'Application System'.
aHTML nextPutAll: '<TABLE BORDER=1>'.
temp1 activeInstancesOfType
do: [:each |
aHTML nextPutAll: '<TR><TD>'.
aHTML nextPutAll: (each description).
aHTML nextPutAll: '</TR></TD>'.
].
aHTML nextPutAll: '</TABLE>'.
Now execute the "Hello World" custom view again by navigating to the "Menu" browser and clicking on the "Hello World" link. The new browser window will now look like this:
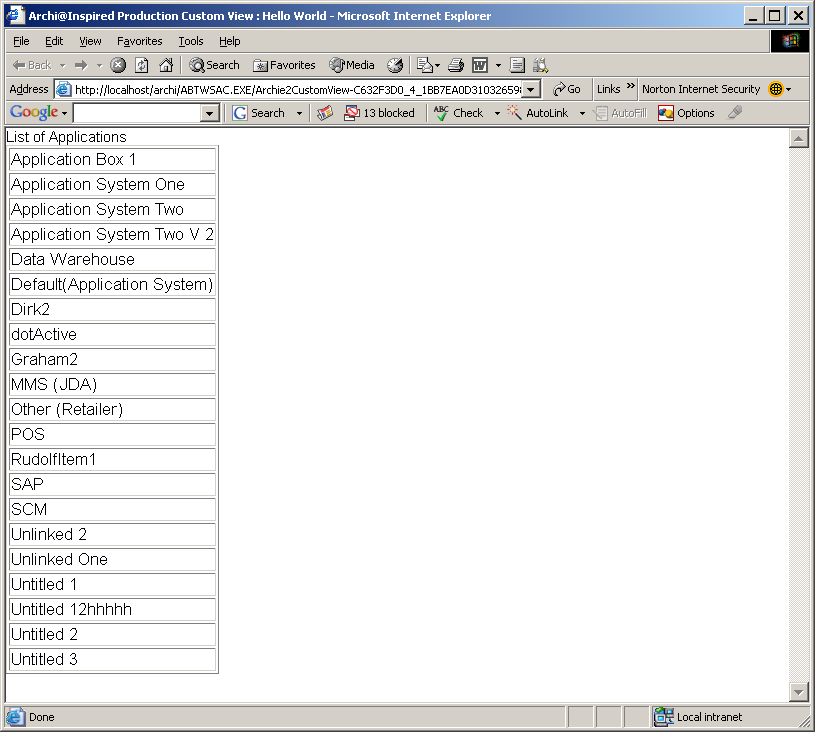
Interactive Custom Views with selection dropdowns
The next logical step for our custom view is to make it a bit more interactive. For this example, we will add a drop-down
box at the top of the browser. The contents of this drop-down box will be all the nodetypes that can legally be linked to an "Application System" nodetype.
When the user selects one of these target nodetypes, the custom view must display a list of Application System
instances as it did before, but next to each instance, it must show all the instances of the target nodetype selected by the user that are linked to that application system.
The code for the drop-down is as follows:
temp2 := Set new.
temp1 activeLegalRelTypes
do: [:legalrel |
legalrel allActiveLegalSourceRelOfTargetNodes
do: [:legaltarget |
temp2 add: (legaltarget targetNodeType).
].
].
temp2 := (temp2 asSortedCollection: [:a :b | a description < b description]).
aHTML nextPutAll: '<SELECT NAME="TARGETNODETYPES">'.
aHTML nextPutAll: '<OPTION VALUE="">Select an Target</OPTION>', aCrLf.
temp2 do: [:target |
aHTML nextPutAll: '<OPTION VALUE="', (target id printString), '">',
(target description) ,'</OPTION>'.
].
aHTML nextPutAll: '</SELECT>'.
Once again, it might be useful to try and make sense of this code with the help of the Object Model in section 2.
Essentially, we are interrogating the Meta definition of the "Application System" nodetype to try and discover a list of all the nodetypes that can legally link to it.
Paste this code just after the line:
Our custom view will now have a dropdown list containing all legal target nodetypes for "Application System". Now we
have to change it so that it will respond to a user selection on this list by sending a new request to the EAWM server.
This is done using a Javascript function which is invoked by the "onChange" event on the drop-down box. The code should be changed to look as follows:
aHTML nextPutAll: '
<SCRIPT LANGUAGE="JAVASCRIPT">
<!--
function getTargetNodeTypes()
{
var myTime = new Date();
var timeNow = myTime.getTime();
thiselement=document.forms["HALLOWORLD"].elements["TARGETNODETYPES"];
NodeType=thiselement.options[thiselement.selectedIndex].value;
parent.location=("Archie2CustomView-', (aSessionData sessionKey),
'?"+timeNow+"%3C', aFocusNode id , '%3E%3C',
aCustomViewNode id, '%3E%3C"+NodeType+"%3E");
return false;
}
// -->
</SCRIPT>
'.
aHTML nextPutAll: 'List of Applications<BR>'.
temp1 := A2NodeTypeHome singleton findByDescr: 'Application System'.
temp2 := Set new.
temp1 activeLegalRelTypes
do: [:legalrel |
legalrel allActiveLegalSourceRelOfTargetNodes
do: [:legaltarget |
temp2 add: (legaltarget targetNodeType).
].
].
temp2 := (temp2 asSortedCollection: [:a :b | a description < b description]).
aHTML nextPutAll: '<FORM NAME="HALLOWORLD">'.
aHTML nextPutAll: '<SELECT NAME="TARGETNODETYPES" onChange="return getTargetNodeTypes()">'.
aHTML nextPutAll: '<OPTION VALUE="">Select an Target</OPTION>', aCrLf.
temp2 do: [:target |
aHTML nextPutAll: '<OPTION VALUE="', (target id printString), '">', (target description) ,'</OPTION>'
.
].
aHTML nextPutAll: '</SELECT>'.
aHTML nextPutAll: '</FORM>'.
aHTML nextPutAll: '<TABLE BORDER=1>'.
temp1 activeInstancesOfType
do: [:each |
aHTML nextPutAll: '<TR><TD>'.
aHTML nextPutAll: (each description).
aHTML nextPutAll: '</TR></TD>'.
].
aHTML nextPutAll: '</TABLE>'.
So whenever the user selects an item from the list, a request is sent back to the EAWM server for the same custom
view (see section 3.1), but with an additional CGI parameter containing the ID of the target nodetype that was selected by the user.
Now we must change the custom view to detect the presence of this additional CGI variable. If it is present, instead of
just listing the "Application System" instances, it should list the instances and also show which instances of the user selected target type are connected to them. This is done by changing the code in the
temp1 activeInstancesOfType
do: [
block to look as follows:
temp1 activeInstancesOfType
do: [:each |
aHTML nextPutAll: '<TR><TD>'.
aHTML nextPutAll: (each description).
(aCGIVars size > 2)
ifTrue: [
aHTML nextPutAll: '</TD><TD>'.
(each sourceInActiveRelationships)
do: [:rel |
(rel targetNode nodeType id = (aCGIVars at: 3))
ifTrue: [
aHTML nextPutAll: '<LI>',
(rel targetNode description), '</LI>'.
].
].
].
aHTML nextPutAll: '</TD></TR>'.
].
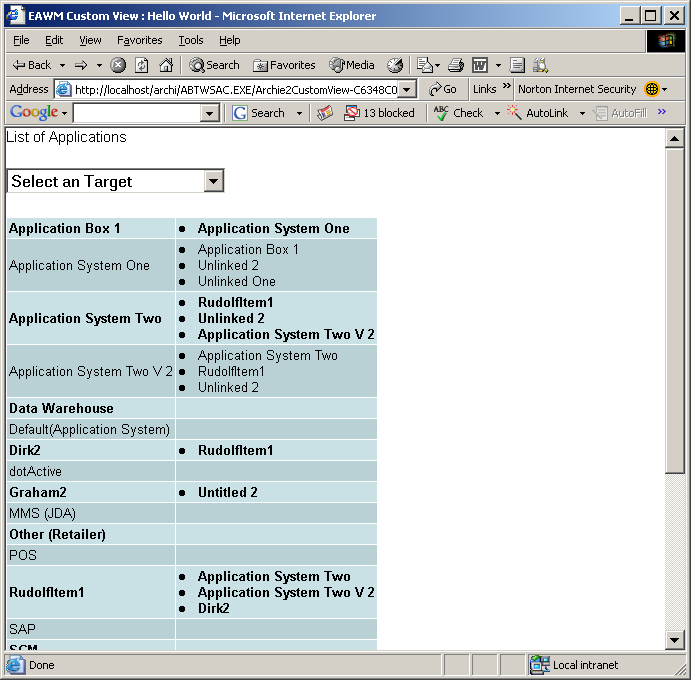
Our custom view is now fully interactive and will provide interesting information as shown below:
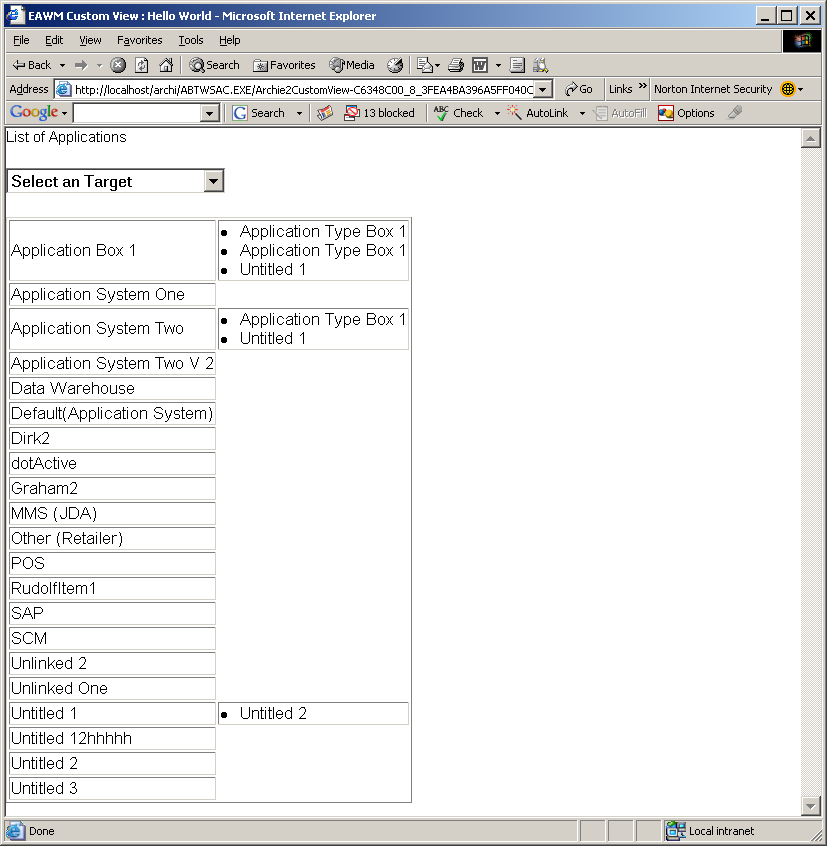
Using your own stylesheet
Unfortunately our custom view is still not very visually appealing. IN this section we will add our own stylesheet and
change the custom view to take advantage of it. By using a corporate stylesheet, you can achieve a standard look and
feel for all your custom views with very little effort. When changes are required, simply change the stylesheet and all your custom views using that stylesheet will change accordingly.
Let's say we have a stylesheet called "HalloWorld.css" that looks as follows:
.oddrow{
background: #c9e0e4;
font-size: 8pt;
color: #000000;
text-align: left;
font-weight: bold;
}
.evenrow{
background: #b9d0d4;
font-size: 8pt;
color: #000000;
text-align: left;
}
A good place to put the stylesheets is in the EVA Netmodeler javascript directory. The physical location of this directory
can be found in the system setting called "JavascriptPath", and the logical location can be found in the setting
"JavascriptURL". Put your stylesheet in this location and link your custom view to it by adding the following line right at the top:
aHTML nextPutAll: '
<link type="text/css" rel="stylesheet" href="', (Archie2BusinessTransactionClass getSetting: 'JavaScriptURL'),'HalloWorld.css" />'.
Now change the
block to look as follows:
temp1 activeInstancesOfType
doWithIndex: [:each :index|
|aClass|
(index odd) ifTrue: [aClass := 'oddrow'] ifFalse: [aClass := 'evenrow'].
aHTML nextPutAll: '<TR><TD CLASS="', aClass, '">'.
aHTML nextPutAll: (each description).
(aCGIVars size > 2)
ifTrue: [
aHTML nextPutAll: '</TD>
<TD CLASS="', aClass, '">'.
(each sourceInActiveRelationships)
do: [:rel |
(rel targetNode nodeType id = (aCGIVars at: 3))
ifTrue: [
aHTML nextPutAll: '<LI>',
(rel targetNode description), '</LI>'.
].
].
].
aHTML nextPutAll: '</TD></TR>'.
].
And change this line:
To look like this:
Our custom view's look and feel is now much more aesthetically pleasing:
Integrating your custom view with your intranet portal
Once you have constructed a custom view, you might want to integrate it with an existing website or with an internet portal. Essentially, you want to expose dynamic EVA Netmodeler
content to web users without them being aware that they are accessing EVA Netmodeler.
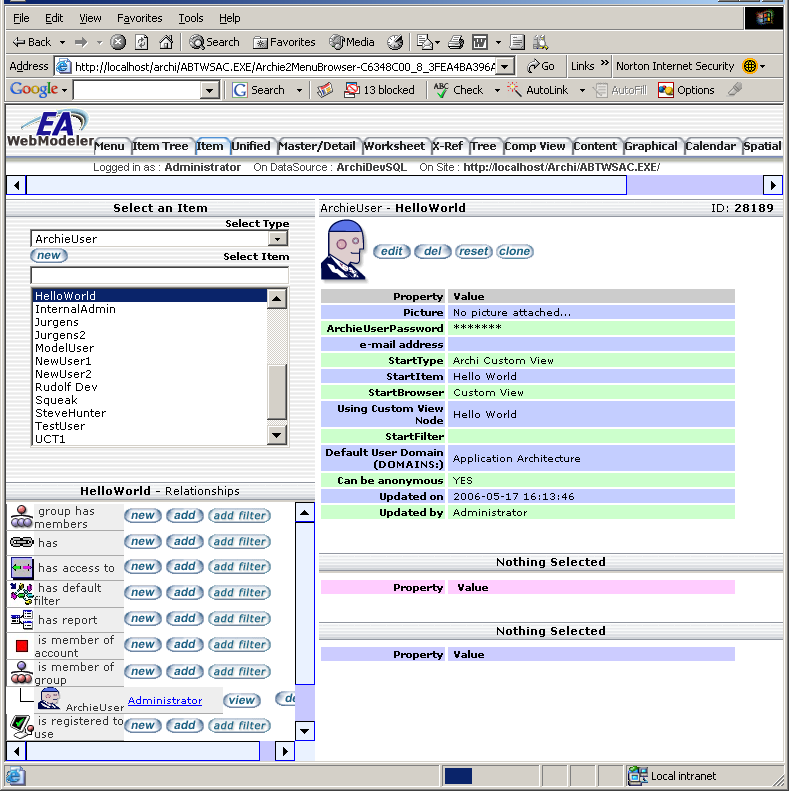
The best way of doing this is to create an anonymous user. An anonymous user can access EVA Netmodeler by simply
specifying a userid. The example below shows an anonymous user set up to go directly to the "Hello World" custom view upon login:
Once this user has been set up correctly, the custom view may be invoked from anywhere using the following HTML link:
http://localhost/archi/ABTWSAC.EXE/ArchieAnonymous?<HelloWorld>
This link is made up as follows:
http://localhost/archi/ABTWSAC.EXE/
|
The value of the "ClassURL" EAWM system setting.
|
ArchieAnonymous
|
The class responsible for handling anonymous logon attempts
|
<HelloWorld>
|
This is a CGI variable passed to the "ArchiAnonymous" class. In this case it is the Userid of the anonymous user we created above.
|
Once you have constructed this link, it may be placed anywhere on an existing web site. As soon as a user clicks on the link, the request will be sent to EVA Netmodeler. EVA Netmodeler
will create the anonymous session and execute the custom view.
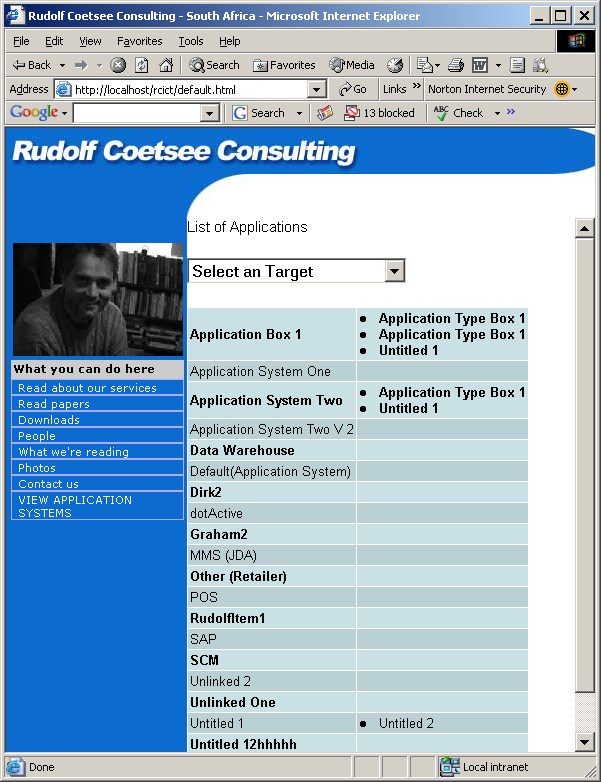
For example, the following HTML was entered into my home page:
<TR>
<TD class="RCCMenuItem" onMouseover="this.bgColor='lightblue'; return true" onMouseout="this.bgColor=''; return true">
<A HREF="http://localhost/archi/ABTWSAC.EXE/ArchieAnonymous?%3CHelloWorld%3E" TARGET="CONTENTS" class="RCCMenuItemText">VIEW APPLICATION SYSTEMS</A>
</TD>
</TR>
This HTML generates a link in the menu on the right of the page. As soon as a user clicks on the link the custom view is displayed seamlessly in the central frame.
How to debug a custom view
Custom views can give two kinds of errors; Compile errors and Runtime errors.
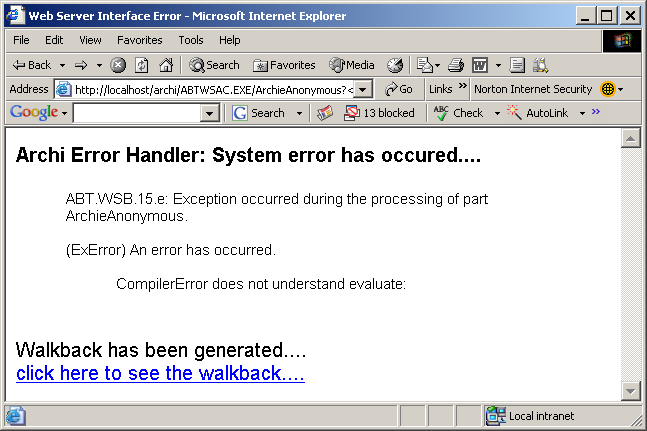
Both errors will show a walkback in the browser window, but complie errors will say "CompilerError does not understand evaluate" as shown below:
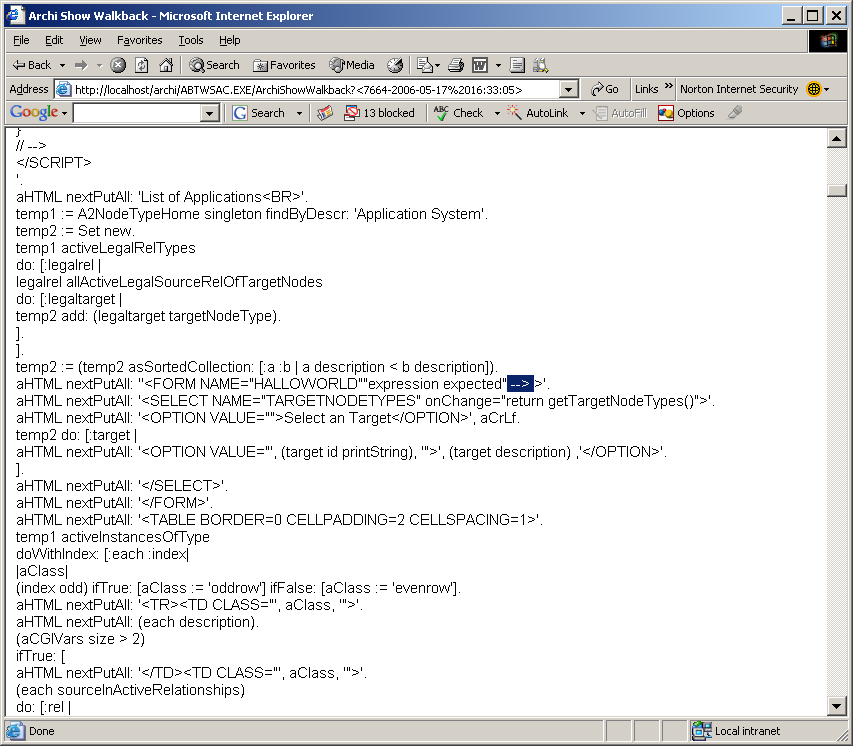
To find out exactly where the compiler got stuck, click on the "click here to see the walkback" link, when the walkback is displayed scroll down until you get to the section that begins with "
CompilerError(Object)>>#error:".Your source code will be listed just below this line. The actual compiler error message is embedded in this code and will always terminate
with the following character sequence: "-->".
I find it is easier to use the browser "File/Search" function to search for occurrences of this character sequence. See for
example the screenshot below that shows a typical compiler error where I entered too many single quote character to the line of code:
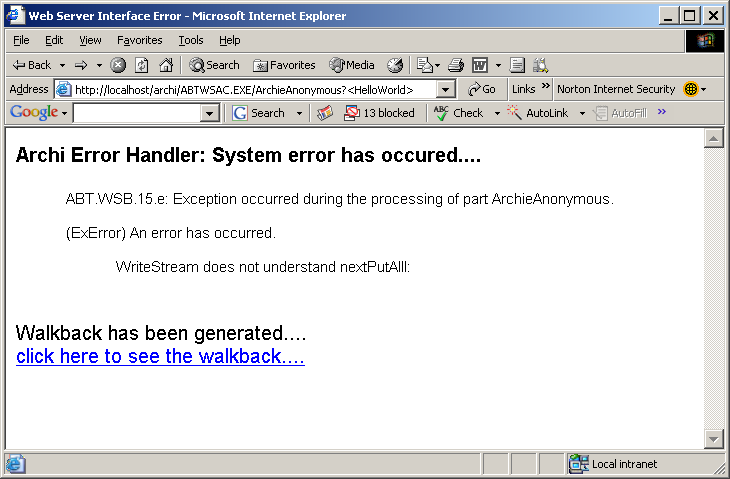
Runtime errors, on the other hand tend to be quite self-explanatory and often it is not even necessary to look at the
walkback to know what is going on. The example below shows an error resulting from having misspelt the "nextPutAll:" method:
|


