Importing data in CSV format
Preparation for the import
Copy all documents and graphics associated with the import to the installation's \EXPORT directory. This step is necessary so that these assets are available to be moved to the appropriate directory and associated with the
correct items during the import process. Failure to perform this step correctly will result in the imported items not being linked to the associated assets.
Performing an Import
- Start the import utility by clicking on the Import Utility item on the System menu. The system menu can be accessed by clicking on the product logo on the top left of most EVA Netmodeler browser windows.
- Specify the Import File Name in the text box when asked for the file name to import. It is easiest to use the Browse button open a file browser control and select the import file from the list provided.
- UN-Check the Do strategy only option, as illustrated below.
Leaving the Do Strategy Only option checked causes the import process to run without saving any of the imported data to the repository. This is useful
to validate the structure of the import file without actually doing the import. This option is also useful for diagnosing some types of import errors. See below for more details.
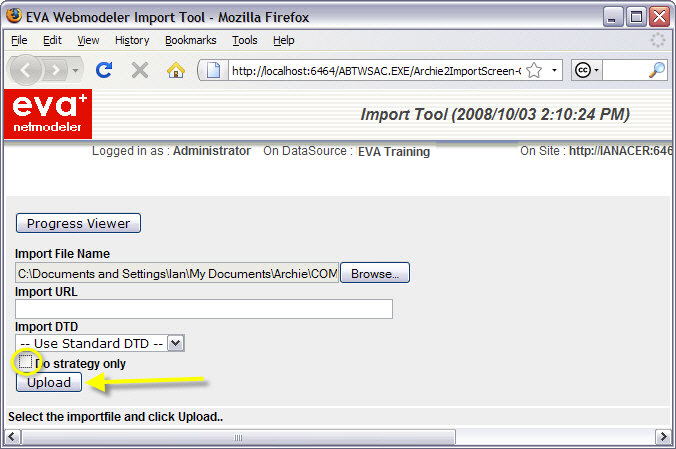
- Select Upload to start the import process
- EVA Netmodeler will then ask you to identify the type of CSV file being imported:
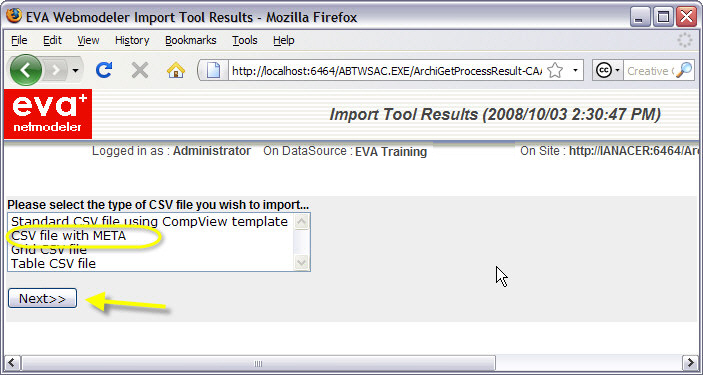
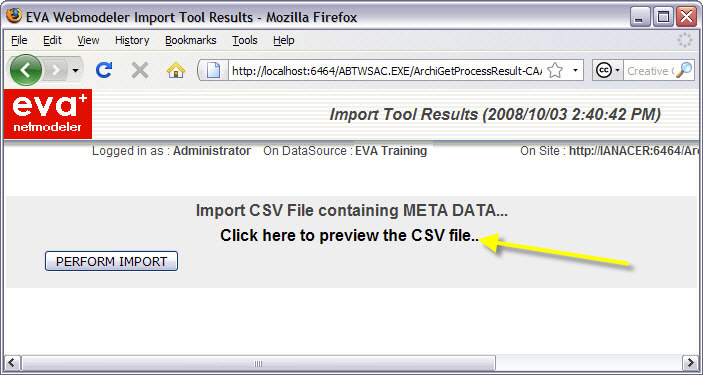
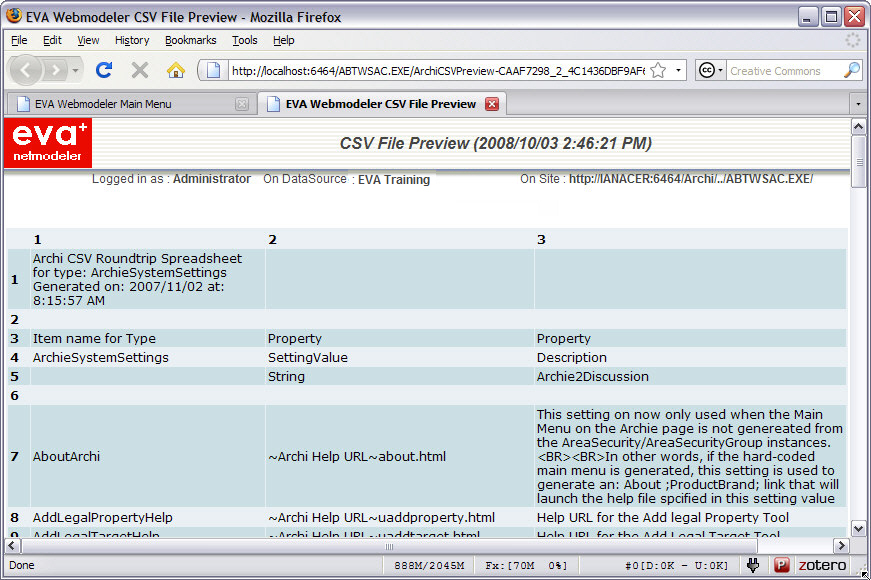
- You have the option to preview the uploaded file to confirm that the column separations have been correctly interpreted
- Select PERFORM IMPORT in the Import Tool Results window to start the import process. The progress of the import process
is reported in a browser window which is automatically updated every few seconds throughout the import process.
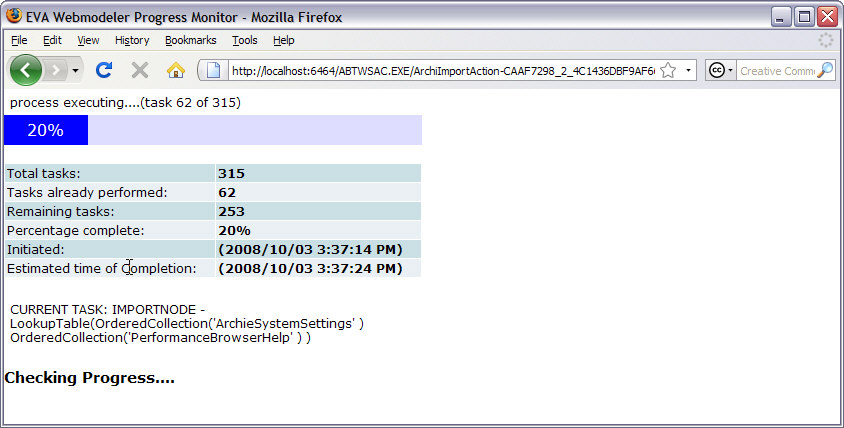
- The import process traverses the import file and takes the following actions:
- For each item found in the import file,
- update the provided properties with the values provided if the item is found in the repository, otherwise, add the item
to the repository using the provided properties. All provided properties are updated, even if the provided property value is the same as the one already in the repository.
- If the item contains one or more relationship groups, for each relationship, attempt to create the specified
relationship to the specified target item. If the target item is not found in the repository, report an error and continue with the next action. (See the section on Interpreting Import Errors)
- Fire any Create or Edit events associated with the updated items
- When the import process is complete, EVA Netmodeler will display the Import Tool Results window similar to the one below.
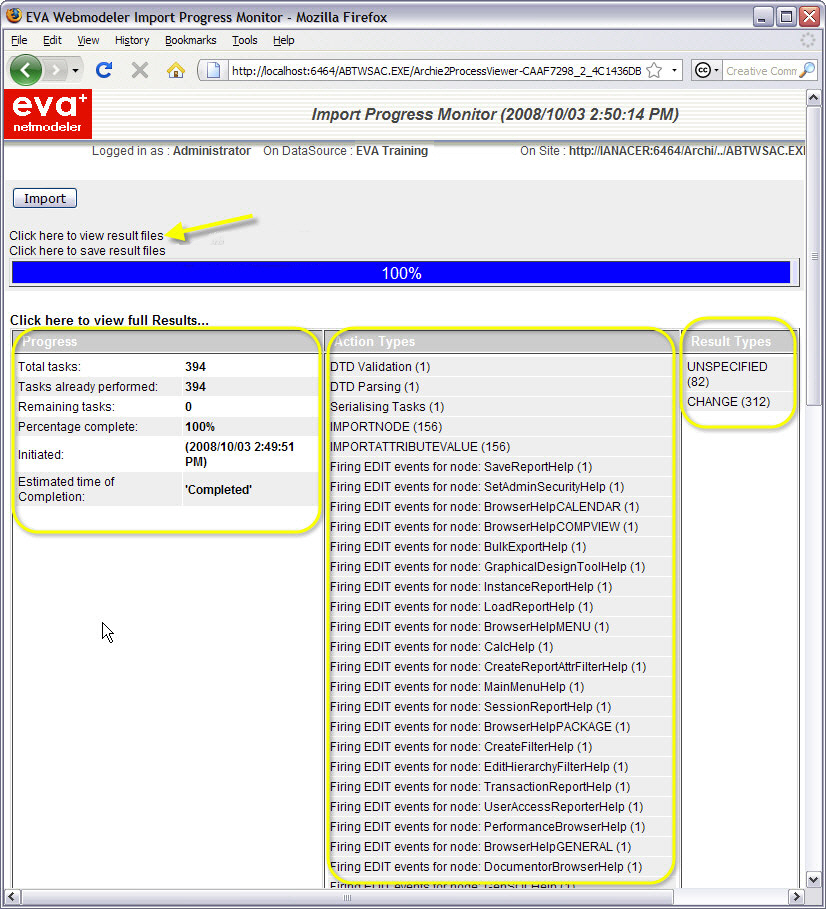
- The Progress column shows the overall progress of the import task - now 100% complete.
It is not unusual for the Total tasks to exceed the expected number of tasks reported during the early stages of the import
process. This is because the Total tasks performed in the import includes additional tasks such as Edit and Update events that could not be predicted at the beginning of the import process.
- The Action Types section displays an index to a log of all the actions that were taken during the import process. Selecting one of these index items opens an Import Actions details window shown below.
- The Result Types column contains an index to a log of the results of the various import actions.
Selecting one of these index items opens an Import Results details window similar to the Import Actions details, except that the log is subdivided by result type.
- Select Click here to view result files to open a browser showing the \Import Results directory on the server. The above result
logs are stored as individual files on the server using the current user name and data-time stamp.
Interpreting the Import log files
In this example we will import a CSV file containing both new and changed items.
The original CSV file was created using the CSV with META option in the Report Browser. Then the Date first production use for the item dotActive was been changed, and the item Microsoft Office
was added. The file was saved in CSV format and imported using the CSV file with META option described above.
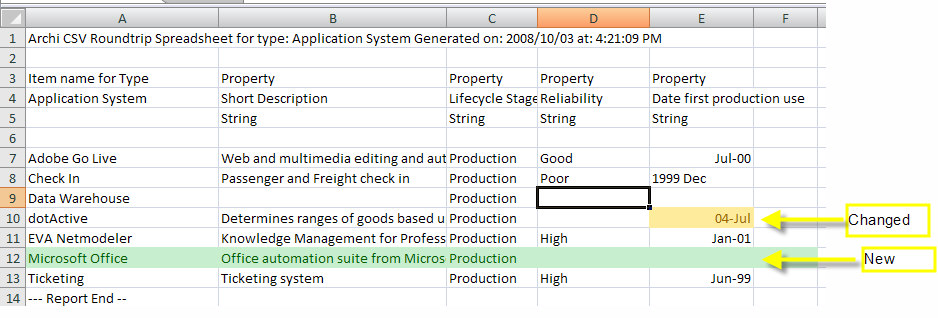
The import process generated the following Import results:
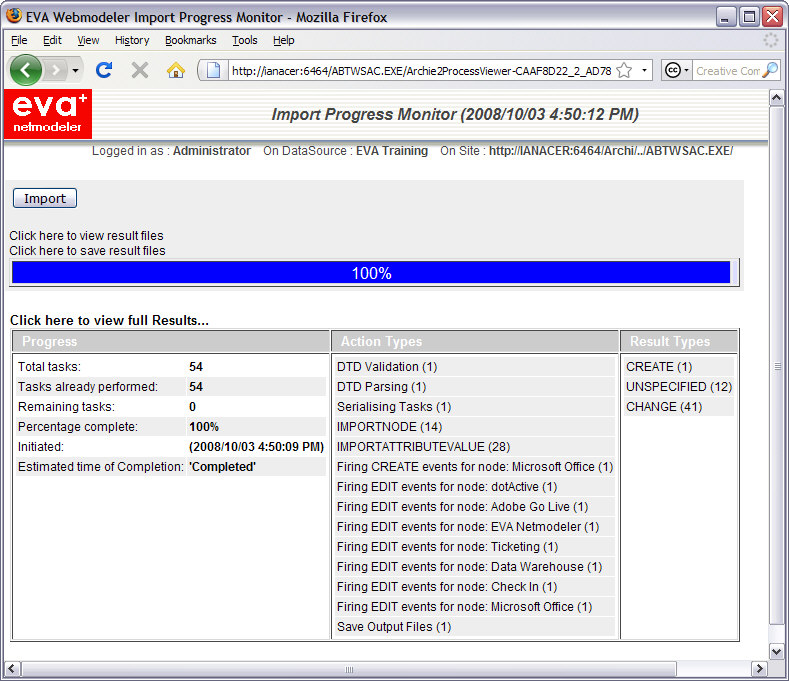
This dsiplay shows that the import has completed. The Result Types column shows that It created one new item, and applied a total of 41 changes.
The IMPORTNODE (14) item in the Action Types column shows that 14 items were imported. Select the item to display the details:
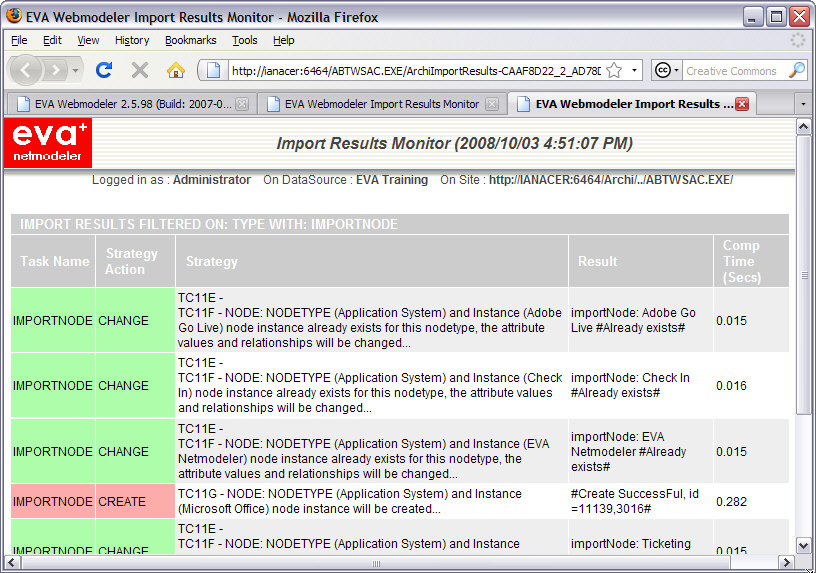
This dsiplay shows that the existing nodes Adobe GO Live, CheckIn and EVA Netmodeler were changed (updated), and the new item Microsoft Office was created.
Selecting the UNSPECIFIED (12) index item from the Import results shows the following summary of tasks performed during the import.
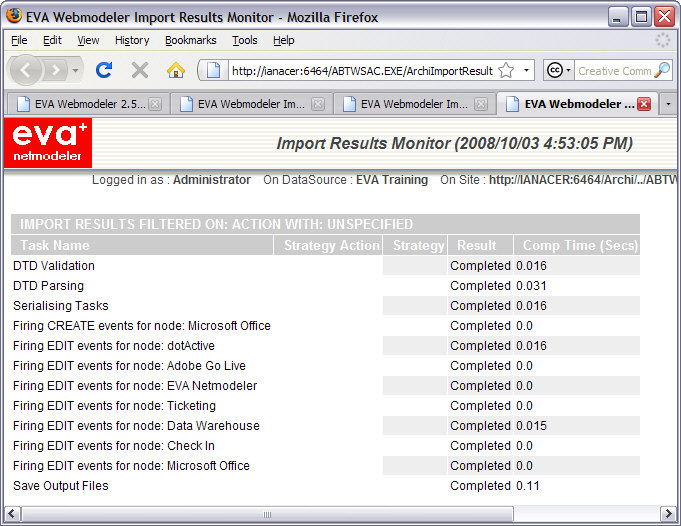
Next we will import a CSV file containing new and changed relationships
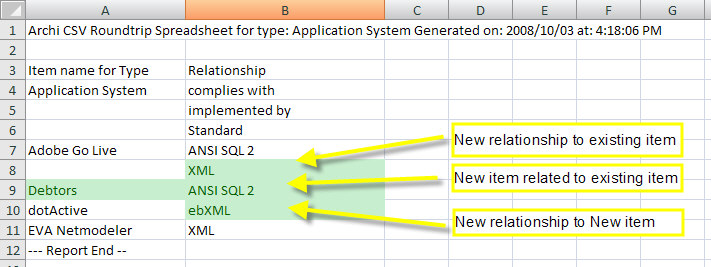
This import produced the following Import result: 5 new items were created, and 11 items were changed.
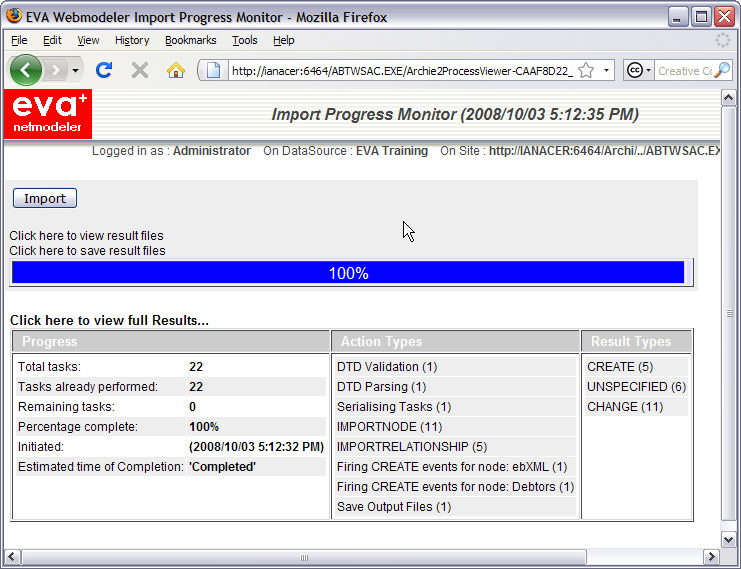
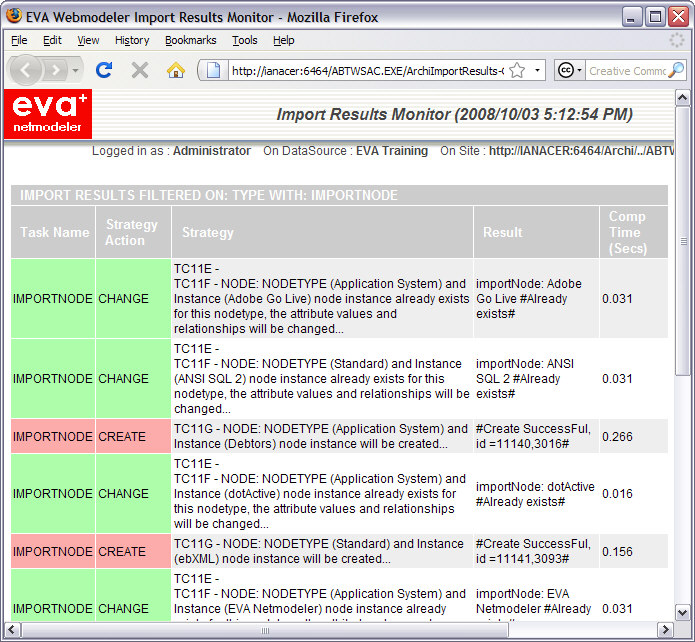
Selecting the IMPORTNODE (11) index item above opens the following display. It shows that the existing Application items Adobe Go Live, and dotActive were updatedand the new Applicaion item Debtors
was Created. Notice also that the related Standard items were also updated and Created as needed.
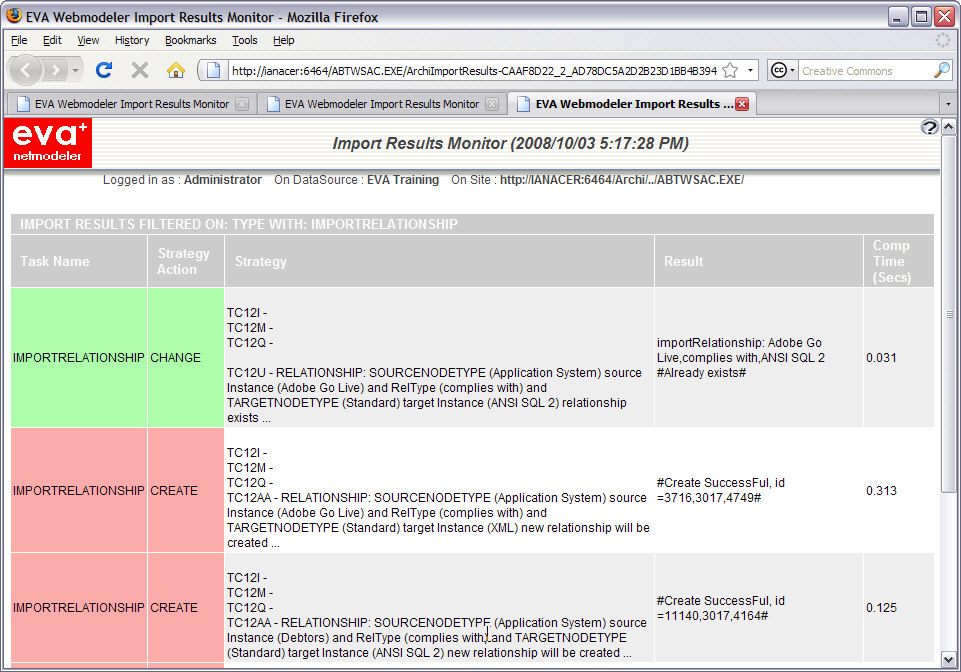
Selecting the IMPORTRELATIONSHIP (5) index item from the Import results shows that existing relationships were identified (and effectively ignored), while new relationships were added.
|