Master Detail Browser
General
The Master Detail browser allows you to work with the detailed content of two related item types. Examples would be a Team and its Members; a Business Unit and its Objectives; A Platform and its System Software components. You
select first the type and item of the master, then the related type of item and relationship type. When selection is complete, the master item is displayed, followed by a table of the related items. If there are info nodes
between the master and related items; their details are displayed as columns on the left of the table. An example would be the Role for a Member in a Team.
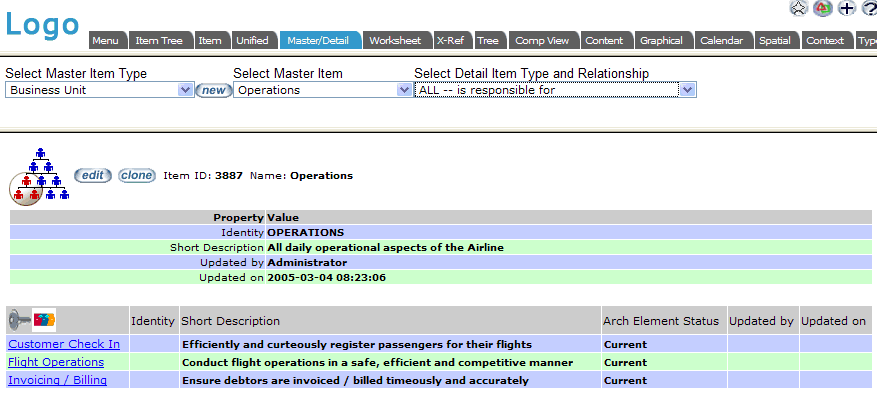
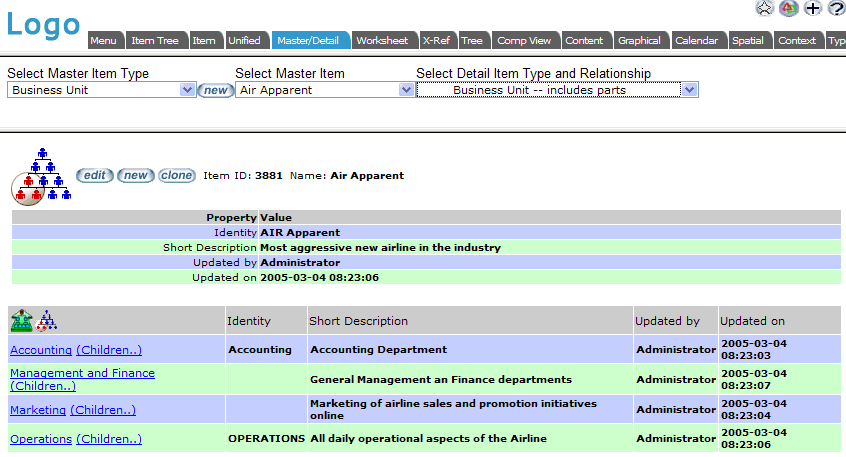
Shown below is a screen capture of the Master Detail browser. Hotspots will take you to specific help for various features.
The general EVA Netmodeler navbar appears on almost all pages. See further help for the Navbar

Select Master Type, Master Item; Related Type and Relationship Frame (below Navbar)
This area allows you to select the type of item and the specific item desired as the master item. Following this, you will
have a list of related item types and relationship types in the right hand side drop down. From this list you select the desired
detail item type and relationship type. You can select a specific target item type or ALL for a given relationship type. For example, you can choose to view:
- Business Unit; Operations; Business Function - is responsible for
which will show the Operations Business Unit and all the Business Functions that it is responsible for
- Business Unit; Operations; ALL - is responsible for
which will show the Operations Business Unit and all related items that it is responsible for (possibly Business
Functions, Data Collections, Products, Services and Projects for examle)
When multiple detail types are listed, new column headings are shown for each type
Pressing the new button in this frame will allow creation of a new item of the selected master item type.
Master Detail View/Edit/Create Frame (bottom)
This is where the currently selected item's details are displayed. The properties of the master item will be listed first in
tabular form, followed by a table containing one row for each related detail item. The related item names are hyperlinks. If
this link is clicked, the browser is refocussed with the detail item becoming the master and the inverse relationship selected
with related items (the previous master item type) shown as detail item(s). For example, you can switch from viewing Project and associated Members to Member and associated Projects.
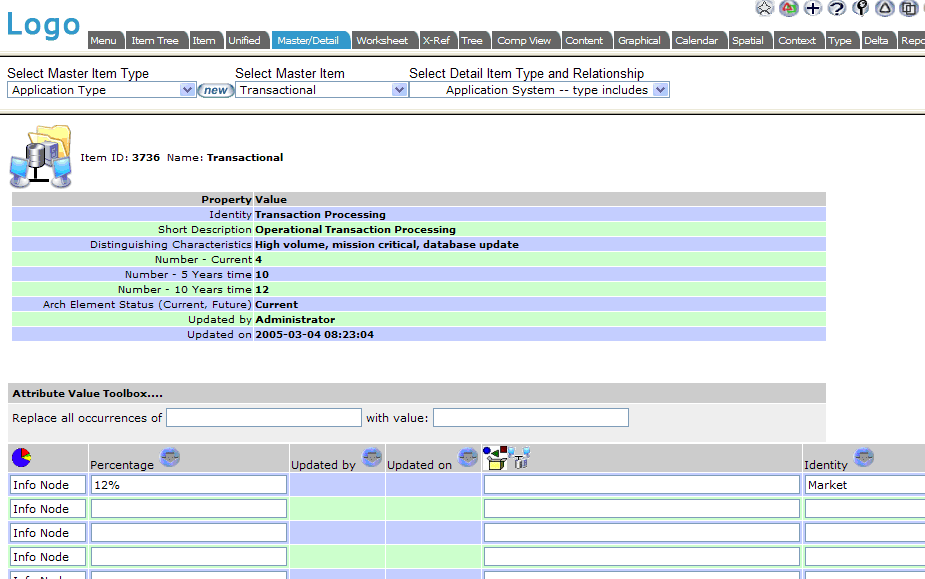
If there is an info node associated with the relationship between the master and detail items, then its details are displayed to
the left of the relevant detail item in the tabular view. An example of a view with info nodes displayed is shown below.
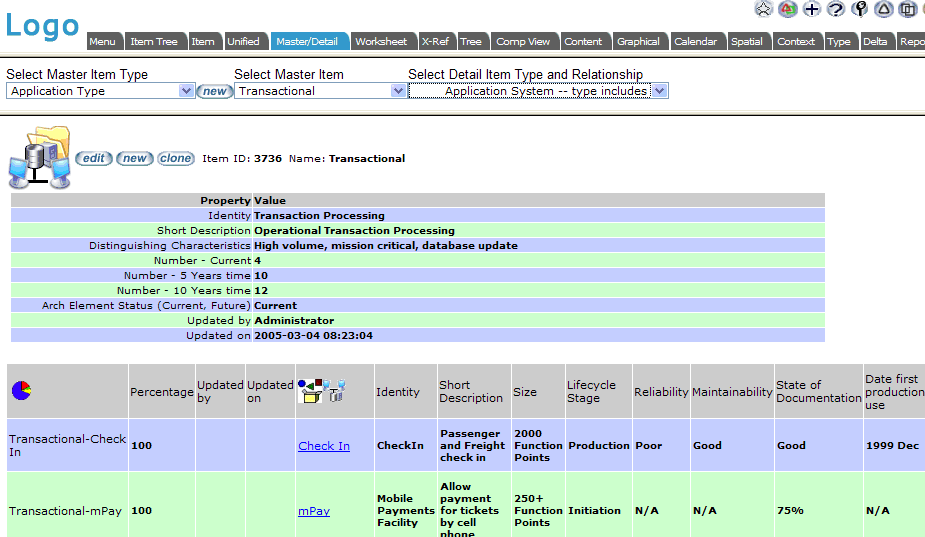
In this view, the info nodes carry the percentage of the Application System that is of the Application Type.
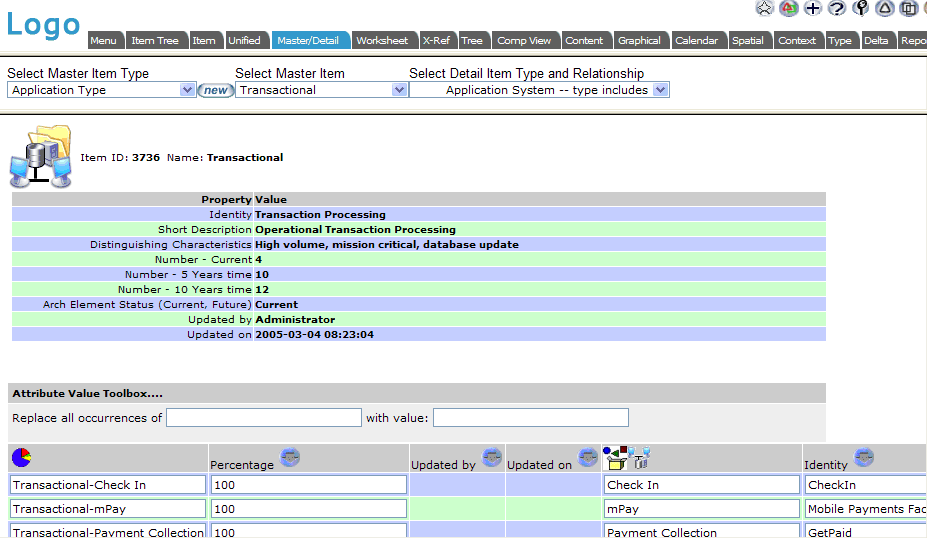
Buttons
The Edit button will allow you to edit the currently displayed detail items, assuming you have necessary security
permissions. There are some restrictions on the data types that are permitted for editing in this view.
Editing provides some convenience features for mass editing. You can replicate a value down a column by entering it in the With Value box and clicking the  down arrow shown in the column heading. Alternatively, you can enter a search and replace string in the
Attribute Value Toolbox and click the down arrow on selected columns where you would like the
search/replace performed. This feature is particularly useful to administrators when customising security settings. It can
also be put to good effect in changing system settings (e.g. when the tool is moved to a new location and paths must be updated). down arrow shown in the column heading. Alternatively, you can enter a search and replace string in the
Attribute Value Toolbox and click the down arrow on selected columns where you would like the
search/replace performed. This feature is particularly useful to administrators when customising security settings. It can
also be put to good effect in changing system settings (e.g. when the tool is moved to a new location and paths must be updated).
An edit screen, showing the toolbox and column headings with down arrows is shown below:
The new button will create a table for capture of a number (typically five) of new detail items in one operation. The new detail items will automatically be associated with the master
item in the same way as the selection made to obtain the display. Submitting the form will cause all items to be added together.
A new screen is shown below. This example is adding Students to a Study Group:
Recursive Structures/Hierarchies and Networks
When the Master and Detail type are the same, we may have recursive structures. These are typically found in hierarchies
e.g. a reporting structure between Person items or a company structure where one Business Unit may include various others, which in turn may include others etc. They may also represent dependency chains e.g. a Project Task has
prerequisites, which in turn may have other prerequisites etc. The Master Detail browser will detect these situations and will
allow drilling down through the structure. In these cases the detail items will have an additional link next to the item name
designated (Children). Clicking this will cause the item to become a new Master Item and Detail Items linked to it in the same way to be displayed. A screen shot illustrating this is below:
Relevant System Settings
There are various system settings that will influence how the browser appears and behaves. See settings group.
|