|
The Graphical Modeler User Interface
This section describes all of the elements of the Graphical Modeler user interface, such as menus, tool bars and the drawing canvas. IT contains the following topics.
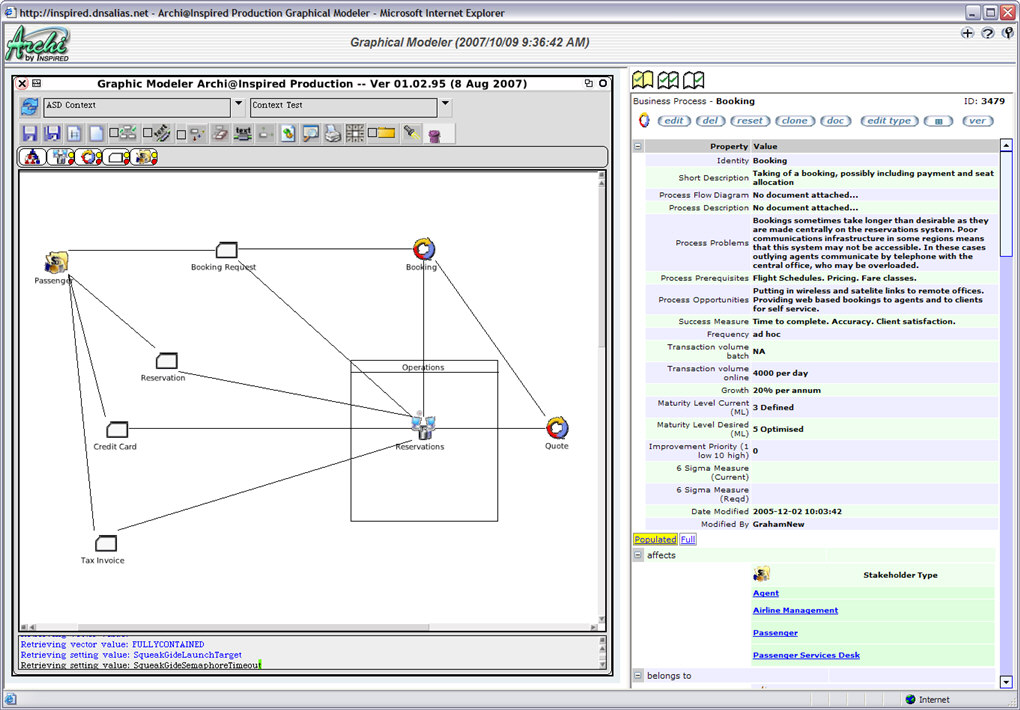
The Graphical Modeler interface consists of the following main elements which are described below.

Toolbar
The toolbar allows you to select model types, models to work with and to control the functions of the graphical modeler. If you hover the cursor over a toolbar item, you will get a yellow tool tip to help you identify its function. In order, from left to right
, the toolbar items are:
- Refresh Model Type list
Requests the list of available model types from the EVA Netmodeler server. Normally, this will have been done
automatically when GM launches. If GM has been open a long time, and you want to retrieve model types defined on the server since you launched GM, use this Function.
- Select Model Type
Allows you to choose the type of model you wish to work with. Examples could be: Business Process Model, UML
Class Diagram, Application Integration Map or an unlimited number of other types. Once a model type is chosen, GM gets the model structure information from the EVA Netmodeler
server and will display the type icon strip below the toolbar. This indicates what types of items you can work with in that kind of model. For example, a business process
model might have stakeholders, process steps, outcomes, resources and documents used or created by the process; a static structure model would have classes and objects. GM will also have received the list of models of the
selected type for you to choose from.
- Select Model
Allows you to choose the model that you wish to work with. If the type of model chosen was a business process
model, you might be offered a choice of various process models. Selecting the model causes GM to retrieve the model details from the EVA Netmodeler server and draw the model in the model space. You will be informed of
progress via a pop-up dialog and entries in the feedback pane.
Once a model is displayed, you can interact with it using the model space. You can also edit the properties and
relationships of items in the model directly in EVA Netmodeler via the Generic Item Display and Edit (GIDE) interface.
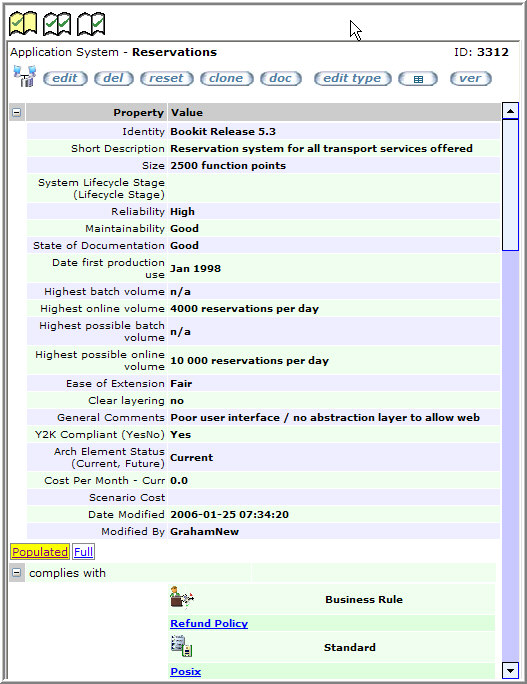
To see the details for an item in the model in GIDE, simply right click the symbol in the model space. GIDE will launch
in the right hand pane with the relevant details. GIDE provides a rich environment to work with a selected item, its
properties, linked content, linked items and relationships between the selected item and other items. It is functionally equivalent to the right hand two panes of the Item Tree Browser.
- Save
Saves the current model to the EVA Netmodeler server. Any new items added to the model space will be created in EVA Netmodeler
. Items deleted in the model space will be deleted from the model, but will not be deleted in the EVA Netmodeler repository (since they may still be valid for other models). If you want to delete something completely from
the repository and all models where it appears, assuming you are authorised to do so, use the GIDE interface.
- Save As
Saves the current model to the EVA Netmodeler server under a new name. The content items in the model will now be linked to multiple models in EVA Netmodeler
. This feature is often used to create later derivatives/versions/scenarios of existing models.
- New Model Type
Allows you to create a new model type by identifying the EVA Netmodeler types that you want to include, how they
should be represented and which of their relationships are valid for this kind of model.
- New Model
Allows you to create a new model of the type selected. New models allow you to add items and relationships interactively, or include items already present in the repository.
- Interactive Layout Option
GM will attempt to move items which have been dropped into the model space in close proximity into a reasonable
layout where they are spaced out enough to work with sensibly.
- Rotate Connector Text Option
If you select this option, text on connectors (labels of relationships) will be rotated with the lines.
- Load Related Items Option
If this option is selected, when you drop an existing item into the model, GM will also retrieve and drop any related
items (connected via relationships in the repository) where those relationships and related types are part of the current model type definition.
- Clear Model Area
Erases items in the model space. The items are deleted from the model, but remain in the repository (assuming they have been previously saved).
- Relationship Descriptions Toggle
Turns display of relationship names on or off. Sometimes useful to simplify a "busy" model. Names are not lost and
can be turned on again at any time.
- Auto Layout
GM will attempt to move items so that they are reasonably well spaced and laid out within the model space. Often useful after a "drop with related items".
- Usage Statistics
EVA Netmodeler maintains statistics regarding the degree of population of the meta model and the currency of the
information (how recently it was updated). Clicking this tool fetches these statistics for the current model type. When items in the model are selected, a handle (red blob) appears which allows querying these statistics.
- Apply Server Settings
Fetches and applies settings held on the server which affect the functioning and appearance of GM. Examples
include: colours, font sizes, icon sizes, overall GM display size. Note: these settings are normally configured by the EVA Netmodeler
system administrator. They can be normal (global) system settings which apply to all users, or can be specified per user.
- Object Inspector
For the more technically minded, or for problem solving. Displays the tree of objects currently in use within the GM environment.
- Print
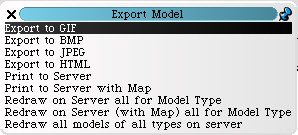
Presents a list of model export options
- The Export options create a file on the default drive of the local machine under a directory "My Squeak\localmachineusername\" e.g. if the users local machine user name is John, the directory "c:\My
Squeak\John\" will be used.
- Export to GIF, BMP and JPEG creates a file in the specified type on the local machine. A default file name is offered, but you can be override it if desired.
- Export to HTML creates an HTML page which includes a .GIF image of the current model. A default file name is offered, but you can be override it if desired.
- Print to server will upload a .JPEG image of the current model to the Model Picture property of the current model item in the repository.
- Print to server with Map does the same as Print to Server, but also saves the information required for web site generation and the Model Map Viewer. The model map is saved to the ModelMapHTML property of the current
model item in the repository.
- Redraw on Server all for Model Type does a "Print to Server" for all models of the currently selected model type
- Redraw on Server (with Map) all for Model Type does a "Print to Server with Map" for all models of the currently selected model type
- Redraw all models of all types on server does a "Print to Server" for every model defined in the repository. This
is a very resource intensive operation and should only be performed when absolutely necessary and at time of low system load.
- Expand Currently Selected Item
Creates a new model or opens an existing model that represents the currently selected model item, and links the new
model to the selected item in the repository via the "expanded as" relationship type.
- Enable / Disable fetching of local images option
Enabling this option causes the Graphical Modeler to retrieve the images for the Type Icon Strip and Model Space from the local machine rather than the server.
- Select Item
Presents a list of the items in the current model and enables you to select an item from the list. When an item is
selected GM makes it the currently selected item on the model and if necessary shifts the currently displayed model area so that the selected item is visible in the model space.
- Trash Can
Dragging a model item or relationship onto the trash can will delete it from the model. Note that items will not be
removed from the repository, since they may still be valid for other models. To completely delete an item from all models and the repository, use the GIDE interface or regular browser based EVA Netmodeler
maintenance interfaces.

Type Icon Strip

This will display icons/symbols for the types of items which can be used in the current model type. Actions available for an icon/symbol include:
- Create new item - Left clicking and dragging an icon into the model space will create anew item of that type. Click in the name text to name the new item.
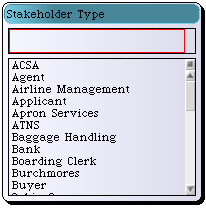
- Add existing item - Right clicking and dragging an icon into the model space will retrieve the list of items of that
type from the server and allow you to select the desired one to drop into the model space. You can instantly filter the item list to make selection easier by typing a selection string in the box provided.
- Hide/ Show items of this type - Clicking the yellow handle for an icon will shrink those icons on the model space. Clicking the red handle
for an icon will restore viewing of those icons on the model space.
This feature allows rapid visual summary of a model by hiding items of types that you do not want to see at that time.
For example, I may get a view of Application to Application dependencies by suppressing display of intervening Interface items.
A special type here is the bounding box. The model type definition may allow certain types to be represented by a bounding
box. If a bounding box is dropped into the model space, it may be stretched and positioned to include other icons. When this
is done, a designated relationship is implied between those icons and the bounding box item. For example, placing a number
of process step icons within a process icon can automatically create the "included in" relationship from activities to the process.

Model Space
The model space is the graphical drawing area where viewing and active modeling takes place. Items can be dropped into
the space by using the icon strip to choose the types of items required. Items can be grabbed and moved within the model
space (relationships will follow). Items (and relationships) can be dragged from the model space to the trash can tool to
delete them from the current model. Items can be right clicked to display their properties in the GIDE display in the right hand
pane. Items can be lasso selected by clicking outside their edges and dragging the cursor diagonally over the items you desire to select. The selected set can then be dragged as a group.
Selected item properties
Items are selected by clicking on them. When an item is selected, a few "handles" will appear. These include:
- Link handle (blue dot)
Click in the blue dot and drag to another item to relate the selected item to the second one. GM will either:
- link them automatically if there is only one valid relationship type between them
- present a list of valid link types to let you choose one, then link the items
- Autolink handle (black dot)
This will appear automatically if you have moved an item inside a bounding box, thereby implying a relationship via the
model type definition. E.g. The model type might say that an Organizational Unit is to be represented by a bounding box, and that Activities placed inside it are to be regarded as performed by it. When you place an item of type Activity
inside an item of type Organizational Unit, the relationship is inferred and the black dot confirms this.
- General item properties
GM may display other decorations for items in the model. Some of these are systemgenerated and others may be
defined as part of the model type mapping, using features of the symbol chosen to represent a certain type.
Examples of system generated decorations are:
- Item expanded as model - normally shown by a round M decoration above the picture. Indicates that the item shown on this model is expanded elsewhere in (at least one) more detailed model (could be the same type of
model or different). Clicking the decoration will launch the related model in the GM model space. If there is more than one related model, GM will offer a list to choose from before launching the related model.

Feedback Pane
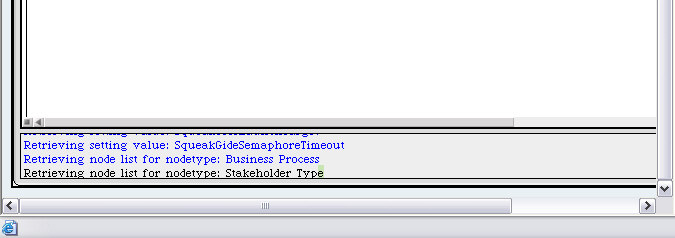
This is a pane at the bottom of the GM screen which provides a transcript of communication between GM and EVA Netmodeler
, as well as detailing what GM has done in response to user actions. Errors encountered will also be reflected here.

GIDE or Type Editor Pane
This pane, to the right of the model space, allows viewing and editing (authority permitting) details and relationships of items
included in models. For normal (instance) models the GIDE display will launch, allowing viewing, editing, linking etc. according to user permissions. For meta models (when editing model types), the EVA Netmodeler
Type Browser will launch allowing viewing, creation and editing of types (user permissions permitting).
To view details of an item in this pane, right click the icon in the model space.

|

![]()
